
Colorblock Dimensional Zipper Pouch

Whip up a zipper pouch for all your small storage needs! Perfect for organizing your tote bag, taking some toiletries on the go, or stashing some snacks. It expands to hold your stuff and folds flat when you don't need it. The fun colorblock details are icing on the cake!
A link to the video recording of the class is here.
MATERIALS
TOOLS
Sewing Machine
Straight Pins
INSTRUCTIONS
STEP ONE:
Cut out all the pieces you’ll need:
One 11.5” x 18.5” rectangle
Two 8” x 2.25” rectangles
Four 2” x 2” squares
One 6” piece of paracord
2 12” pieces of 5/8” grosgrain ribbon

STEP TWO:
Sandwich both the zipper ends between 2 of the 2” squares and sew 1/2” from the ends. Iron fabric squares away from zipper.

STEP THREE:
Pin and sew zipper about 1/8th inch from the edge of your main fabric, centering it on the 11.5” edge. The functional side of the zipper faces up. Sew close to the edge of the zipper tape and trim the fabric squares down to the edge of the fabric.

STEP FOUR:
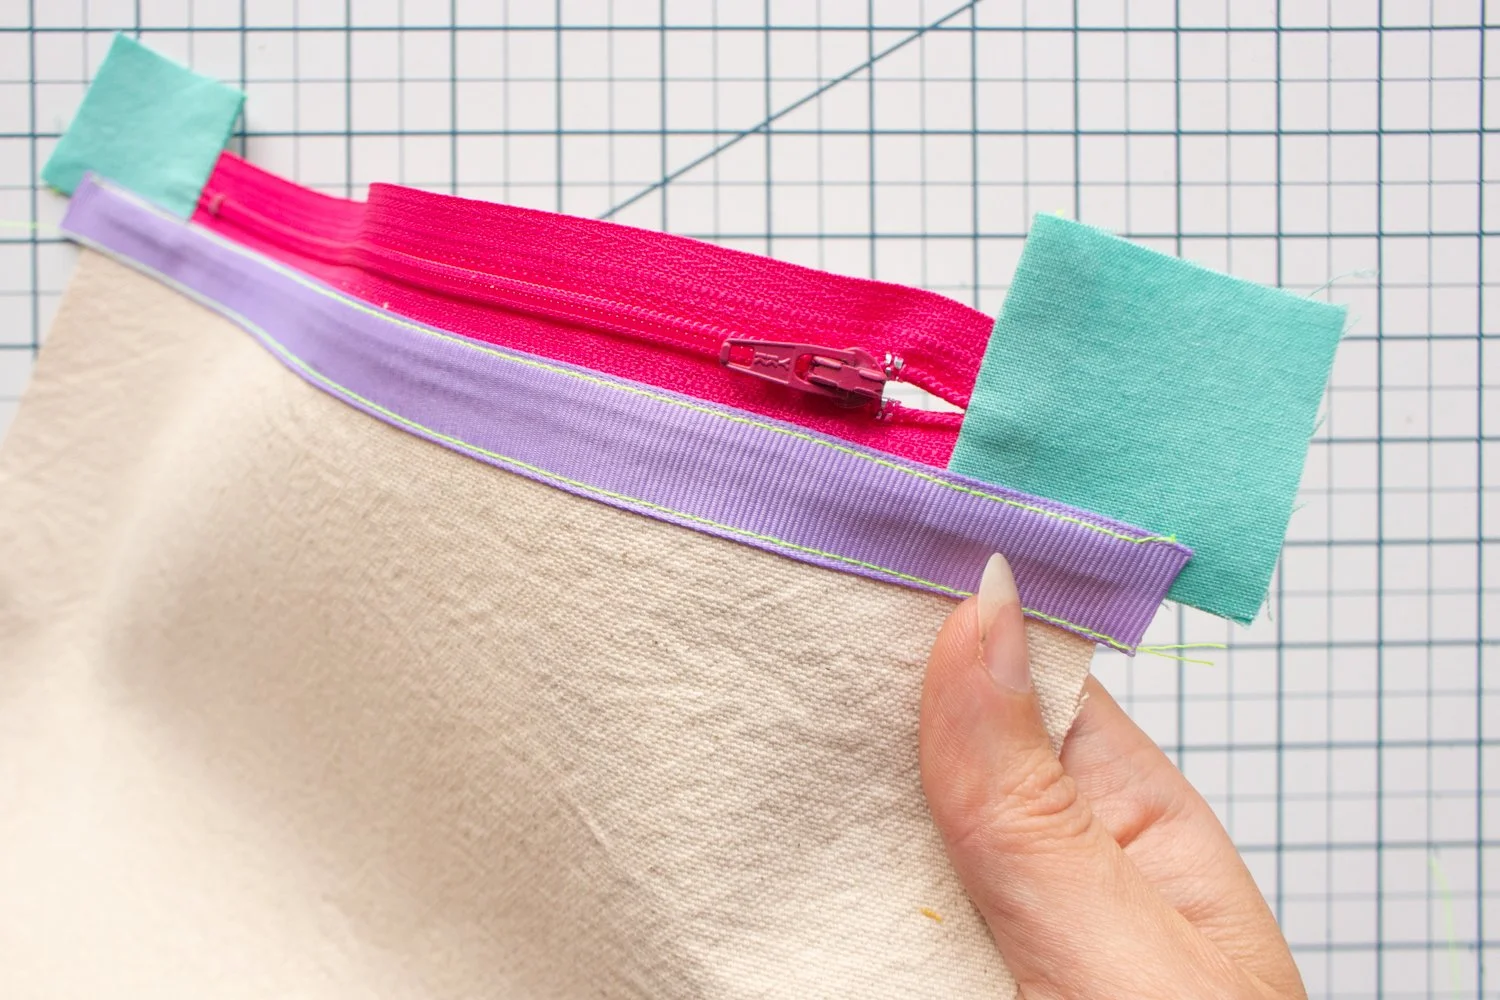
Topstitch the ribbon over the previous stitching, just covering it.

Fold the main fabric away from the zipper and iron. Topstitch the other side of the ribbon to the fabric, encasing the edge of your main fabric and the edge of the zipper tape inside the ribbon.
STEP FIVE:
Sew the zipper to the other edge of your main fabric, and topstitch the second piece of ribbon over that stitching line.

STEP SIX:
Fold the fabric away from the zipper and iron flat. Topstitch the other side of the ribbon to the main fabric. This is easiest of you flip the tube inside out.

STEP SEVEN:
Center the zipper on the tube by folding it in half, and pin the zipper to the center point. Fold the tube into it’s final shape. The accordion folds on each side should be 1.5”, and the folds on the edges should stack perfectly on top of each other.

STEP EIGHT:
Place the paracord in the center of the zipper tab as shown and zig zag over it to secure it in place.

STEP NINE:
Stitch the binding on the back side of the pouch 1/2” from the edge.

Fold and iron the binding over the front, covering the previous stitching. Fold the edges to the inside and topstitch close to the edge.

Repeat with the other binding.

YOU’RE DONE!
Stuff it full of snacks.